
For the complete documentation index, see llms.txt. Markdown versions of all pages are available by appending .md to any URL (e.g. /max/get-started.md).
Image generation
With MAX, you can run open-source image generation models locally and access
them through a REST API. This page explains how to use the
v1/responses endpoint to generate
images from text prompts or transform existing images, with examples for each
input type.
Endpoint
The MAX v1/responses endpoint
provides a unified interface for diverse AI tasks including image generation,
with structured input and output handling. It's built on Open
Responses, an open-source
initiative to create a standardized, provider-agnostic API specification that
works across different AI providers and model backends.
Text input
For text-to-image generation, set input to a plain string describing
the image you want. The model returns the generated image as base64-encoded
data in output[0].content[0].image_data:
- Python
- curl
response = client.responses.create(
    model="black-forest-labs/FLUX.2-dev",
    input="Your text prompt here",
    extra_body={
        "provider_options": {
            "image": {"height": 1024, "width": 1024, "steps": 28}
        }
    }
)

image_data = response.output[0].content[0].image_data
curl -X POST http://localhost:8000/v1/responses \
-H "Content-Type: application/json" \
-d '{
"model": "black-forest-labs/FLUX.2-dev",
"input": "Your text prompt here",
"provider_options": {
"image": {"height": 1024, "width": 1024, "steps": 28}
}
}'Image URL input
For image-to-image workflows, set input to a structured message array
containing the source image URL and a text prompt describing the
transformation. The type field distinguishes image and text content
within the same message:
- Python
- curl
response = client.responses.create(
    model="black-forest-labs/FLUX.2-dev",
    input=[
        {
            "role": "user",
            "content": [
                {
                    "type": "input_image",
                    "image_url": "https://example.com/input.png"
                },
                {
                    "type": "input_text",
                    "text": "Your transformation prompt"
                }
            ]
        }
    ],
    extra_body={
        "provider_options": {
            "image": {"height": 1024, "width": 1024, "steps": 28}
        }
    }
)

image_data = response.output[0].content[0].image_data
curl -X POST http://localhost:8000/v1/responses \
-H "Content-Type: application/json" \
-d '{
"model": "black-forest-labs/FLUX.2-dev",
"input": [
{
"role": "user",
"content": [
{
"type": "input_image",
"image_url": "https://example.com/input.png"
},
{
"type": "input_text",
"text": "Your transformation prompt"
}
]
}
],
"provider_options": {
"image": {"height": 1024, "width": 1024, "steps": 28}
}
}'Local file input
Local files must be base64-encoded and passed as a data URI in the image_url
field using the format data:<mime-type>;base64,<data>.
- Python
- curl
import base64

with open("/path/to/image.png", "rb") as f:
    image_base64 = base64.b64encode(f.read()).decode("utf-8")

response = client.responses.create(
    model="black-forest-labs/FLUX.2-dev",
    input=[
        {
            "role": "user",
            "content": [
                {
                    "type": "input_image",
                    "image_url": f"data:image/png;base64,{image_base64}"
                },
                {
                    "type": "input_text",
                    "text": "Your transformation prompt"
                }
            ]
        }
    ],
    extra_body={
        "provider_options": {
            "image": {"height": 1024, "width": 1024, "steps": 28}
        }
    }
)

image_data = response.output[0].content[0].image_data
IMAGE_DATA=$(base64 -w 0 /path/to/image.png)
cat <<EOF > request.json
{
"model": "black-forest-labs/FLUX.2-dev",
"input": [{"role": "user", "content": [
{"type": "input_image", "image_url": "data:image/png;base64,$IMAGE_DATA"},
{"type": "input_text", "text": "Your transformation prompt"}
]}],
"provider_options": {"image": {"height": 1024, "width": 1024, "steps": 28}}
}
EOF
curl -X POST http://localhost:8000/v1/responses \
-H "Content-Type: application/json" \
-d @request.jsonProvider options
The provider_options argument is an extension point in the Open Responses
spec that lets each API provider expose parameters beyond the standard request
fields. MAX uses it to surface image generation controls such as dimensions and
denoising steps.
The following are some commonly used parameters under provider_options.image.
This is not an exhaustive list. For the complete reference, see
provider_options.
| Parameter | Type | Default | Description |
|---|---|---|---|
height | integer | model default | Output height in pixels. Must be at least 128 and a multiple of 8. |
width | integer | model default | Output width in pixels. Must be at least 128 and a multiple of 8. |
steps | integer | model default | Number of denoising steps. More steps generally produce higher quality but take longer. |
guidance_scale | number | 3.5 | How closely the output follows the prompt. Higher values (7–10) increase prompt adherence; lower values (1–3) allow more creative variation. |
negative_prompt | string | null | Content to avoid in the output. |
num_images | integer | 1 | Number of images to generate per request. |
output_format | string | jpeg | Encoding format for the output image: jpeg, png, or webp. |
Some parameters apply only to specific model families:
secondary_promptandsecondary_negative_prompt— FLUX and Z-Image models only (dual text-encoder architecture)strength(image-to-image denoising strength) — FLUX and Z-Image models only
For the full parameter list including strength, response_format,
dual-encoder prompts, and CFG controls, see
provider_options.
Height and width: You can generate images at different aspect ratios. Image dimensions must be a multiple of 8 and at least 128 pixels in each dimension. Some models may further round dimensions down to the nearest multiple of 16 internally to satisfy patchification constraints; see the model documentation for details.
Steps: steps has the greatest effect on generation time.
Diffusion models work by iteratively refining a noisy image. More steps
produce higher-quality results but take proportionally longer. You can
experiment with steps when considering the tradeoffs of speed and quality.
(Note that because FLUX.2-Klein models are trained for exactly 4
steps, you must set steps to 4 for those models.)
Prompt adherence: guidance_scale determines how literally the model
interprets your prompt. Higher values (7-10) produce results that closely
match the prompt. Lower values (1-3) allow more creative variation.
Negative prompts: Use negative_prompt to steer the model away from
unwanted content, for example "blurry, low quality, distorted". It's best
practice to include any negative prompting in the negative_prompt argument
and not in the main input_text string.
If you encounter memory errors, try reducing your output image dimensions or the number of denoising steps:
"provider_options": {"image": {"height": 512, "width": 512, "steps": 25}}Cache backends
Diffusion pipelines can skip redundant transformer passes during the denoising loop to speed up generation. MAX exposes two cache backends, configured at server startup. Both are off by default and are mutually exclusive — enable at most one (setting both raises an error).
TaylorSeer (recommended): enable with --taylorseer on
max serve. TaylorSeer runs the transformer in full for a
short warmup, then uses a Taylor-series approximation to skip most later steps
on a fixed schedule. It gives the larger, most predictable speedup and is
near-lossless at the default settings. Two presets:
- Balanced (default):
--taylorseer. - Fast:
--taylorseer --taylorseer-warmup-steps 4— skips more steps for a larger speedup, with a bit more drift from the uncached image (still coherent and on-prompt).
The --taylorseer-cache-interval, --taylorseer-warmup-steps, and
--taylorseer-max-order flags override the model defaults for finer control
(interval is a fidelity dial; warmup is the speed lever).
max serve \
  --model black-forest-labs/FLUX.2-dev \
  --taylorseer
First-block cache (FBCache): enable with --first-block-caching. FBCache
reuses transformer state from the previous step when the first-block residual is
similar enough (a model-specific threshold). Unlike TaylorSeer it needs no
tuning and adapts per prompt, but the speedup is smaller and data-dependent.
max serve \
  --model black-forest-labs/FLUX.2-dev \
  --first-block-caching
Quickstart
In this quickstart, learn how to set up and run FLUX.2-dev for image generation.
System requirements:
Mac
Linux
WSL
GPU
Set up your environment
Create a Python project to install our APIs and CLI tools:
- pixi
- uv
- If you don't have it, install
pixi:curl -fsSL https://pixi.sh/install.sh | shThen restart your terminal for the changes to take effect.
- Create a project:
pixi init image-generation-quickstart \ -c https://conda.modular.com/max-nightly/ -c conda-forge \ && cd image-generation-quickstart - Install
modular(nightly):pixi add modular - Start the virtual environment:
pixi shell
- If you don't have it, install
uv:curl -LsSf https://astral.sh/uv/install.sh | shThen restart your terminal to make
uvaccessible. - Create a project:
uv init image-generation-quickstart && cd image-generation-quickstart - Create and start a virtual environment:
uv venv && source .venv/bin/activate - Install
modular(nightly):uv add modular \ --index https://whl.modular.com/nightly/simple/ \ --prerelease allow
Serve your model
First, enable the v1/responses endpoint by setting the MAX_SERVE_API_TYPES
environment variable:
export MAX_SERVE_API_TYPES='["responses"]'Agree to the FLUX license and make your Hugging Face access token available in your environment:
export HF_TOKEN="hf_..."Then, use the max serve command to start a local model
server with the FLUX.2-dev model:
max serve \
  --model black-forest-labs/FLUX.2-dev
The endpoint is ready when you see this message printed in your terminal:
Server ready on http://0.0.0.0:8000 (Press CTRL+C to quit)For a complete list of max CLI commands and options, refer to the
MAX CLI reference.
Generate an image from text
Generate an image from a text description by sending a request to the
v1/responses endpoint. The input field is a text string describing the
desired image, and provider_options controls generation parameters provided
by Modular. You can send requests using either the OpenAI Python SDK or curl:
- Python
- curl
You can use OpenAI's Python client to interact with the image generation model. First, install the OpenAI SDK:
- pixi
- uv
- pip
- conda
pixi add openaiuv add openaipip install openaiconda install openaiThen, create a client and make a request to the model:
import base64
from openai import OpenAI

client = OpenAI(base_url="http://localhost:8000/v1", api_key="EMPTY")

response = client.responses.create(
    model="black-forest-labs/FLUX.2-dev",
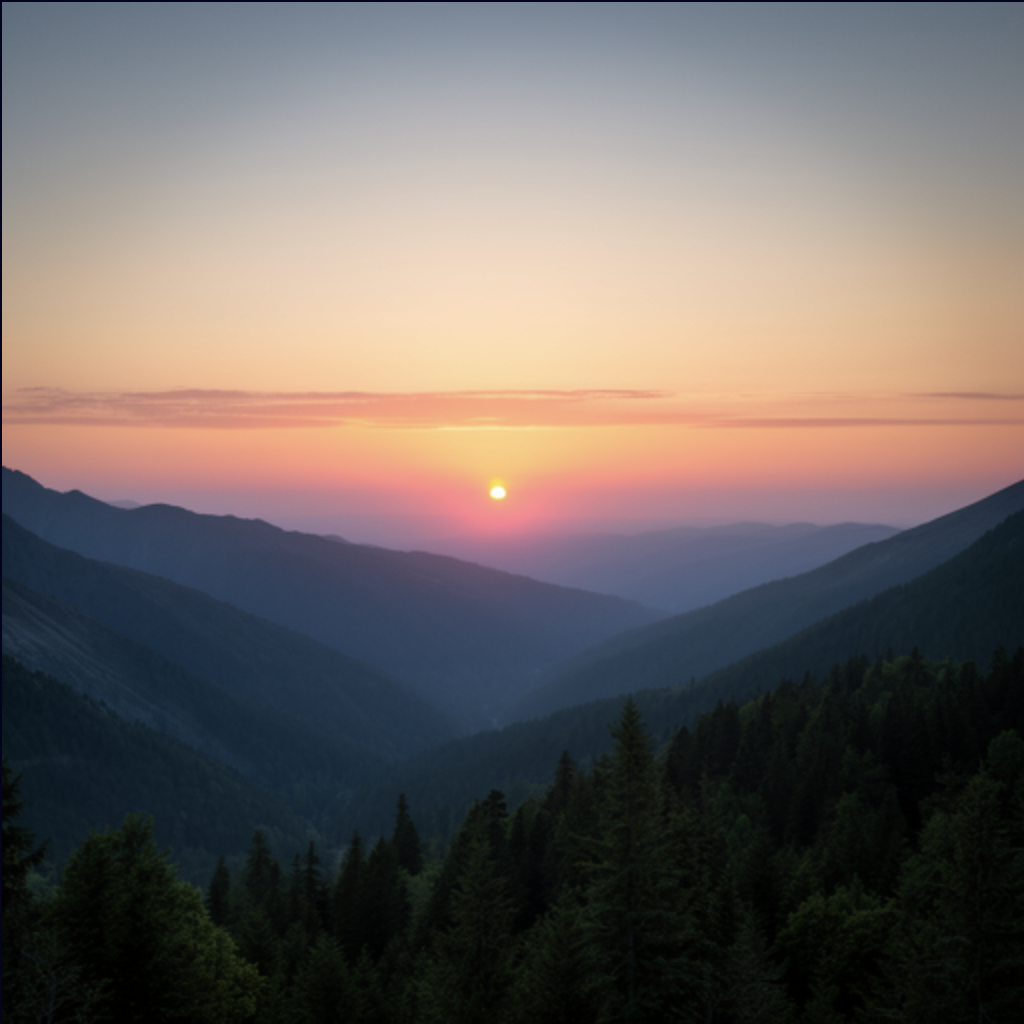
    input="A serene mountain landscape at sunset",
    extra_body={
        "provider_options": {
            "image": {"height": 512, "width": 512, "steps": 28}
        }
    }
)

image_data = response.output[0].content[0].image_data
with open("output-text-to-image.png", "wb") as f:
    f.write(base64.b64decode(image_data))
Run the script to generate the image:
python generate-image.pyThe model saves the generated image to output-text-to-image.png in your
current directory.
Send a request to the v1/responses endpoint and decode the base64-encoded
image data from the response:
curl -X POST http://localhost:8000/v1/responses \
  -H "Content-Type: application/json" \
  -d '{
    "model": "black-forest-labs/FLUX.2-dev",
    "input": "A serene mountain landscape at sunset",
    "provider_options": {
      "image": {"height": 512, "width": 512, "steps": 28}
    }
  }' | jq -r '.output[0].content[0].image_data' | base64 -d > output-text-to-image.png
This sends a text prompt to the model and decodes the base64-encoded image
data from the response into output-text-to-image.png.
Your output should look similar to the following:
Use your generated image as input
You can then take the image generated in the previous step and make additional customizations with the image-to-image workflow by providing both an image and a text prompt:
- Python
- curl
Read and encode the output image from the previous step, then send it along with a text prompt to the model:
import base64
from openai import OpenAI

client = OpenAI(base_url="http://localhost:8000/v1", api_key="EMPTY")

with open("output-text-to-image.png", "rb") as f:
    image_base64 = base64.b64encode(f.read()).decode("utf-8")

response = client.responses.create(
    model="black-forest-labs/FLUX.2-dev",
    input=[
        {
            "role": "user",
            "content": [
                {
                    "type": "input_image",
                    "image_url": f"data:image/png;base64,{image_base64}"
                },
                {
                    "type": "input_text",
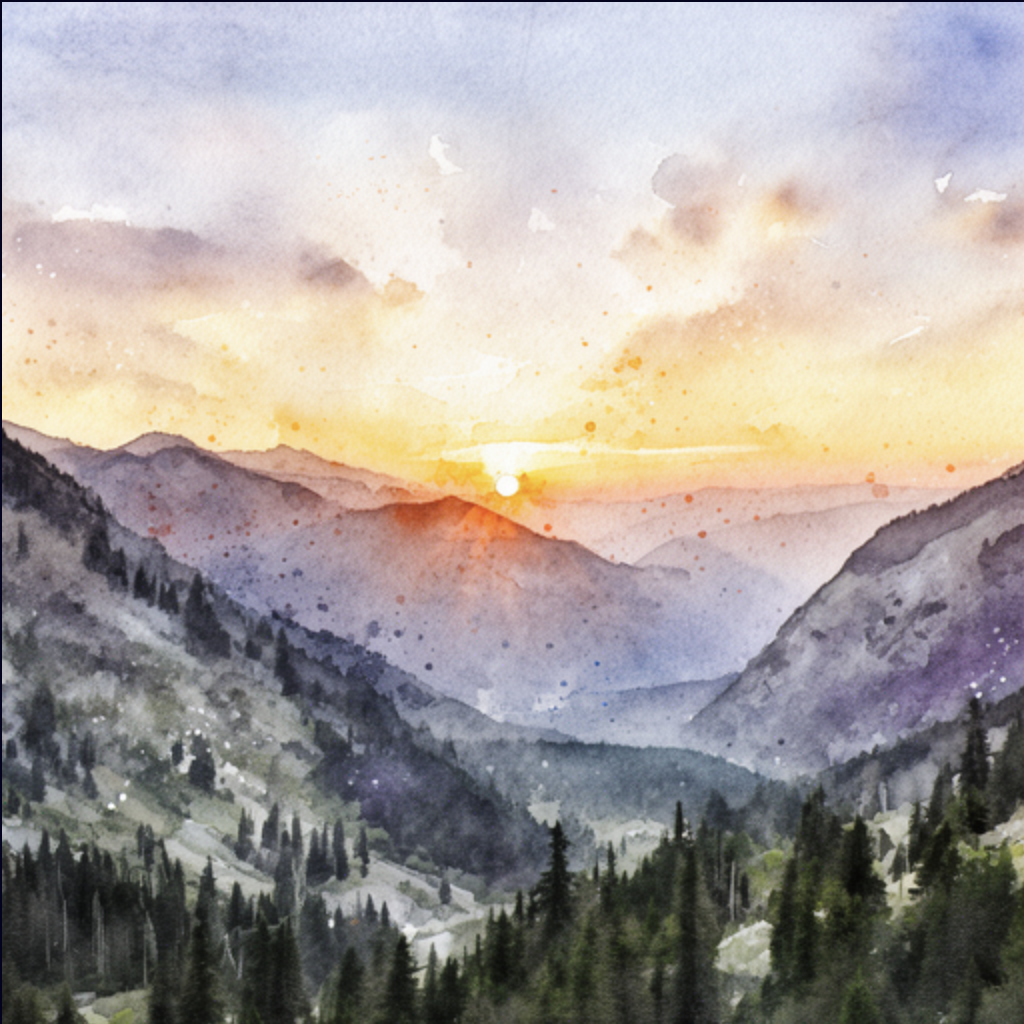
                    "text": "Transform this into a watercolor painting"
                }
            ]
        }
    ],
    extra_body={
        "provider_options": {
            "image": {"height": 512, "width": 512, "steps": 28}
        }
    }
)

image_data = response.output[0].content[0].image_data
with open("output-image-to-image.png", "wb") as f:
    f.write(base64.b64decode(image_data))
Run the script to generate the image:
python generate-image-to-image.pyThe model saves the transformed image to output-image-to-image.png in your
current directory.
First, encode the output image to base64 format:
IMAGE_BASE64=$(base64 -w 0 /path/to/image-generation-quickstart/output-text-to-image.png)The base64 string is extremely large. If you include it directly in the curl command, it will exceed the Linux argument size limit. Instead, store the request payload in a JSON file:
cat <<EOF > request.json
{
  "model": "black-forest-labs/FLUX.2-dev",
  "input": [
    {
      "role": "user",
      "content": [
        {
          "type": "input_image",
          "image_url": "data:image/png;base64,$IMAGE_BASE64"
        },
        {
          "type": "input_text",
          "text": "Transform this into a watercolor painting"
        }
      ]
    }
  ],
  "provider_options": {
    "image": {"height": 512, "width": 512, "steps": 28}
  }
}
EOF
Then, reference the JSON request payload when making your image-to-image request:
curl -X POST http://localhost:8000/v1/responses \
  -H "Content-Type: application/json" \
  -d @request.json \
  | jq -r '.output[0].content[0].image_data' \
  | base64 -d > output-image-to-image.png
Your output should look similar to the following:
Next steps
Now that you can generate images, explore other inference capabilities and deployment options.
- Image and video to text: Use the MAX chat completions endpoint with image or video input to generate descriptions and answer questions about visual content.
- Structured output: Enable structured output with your GenAI deployments for predictable responses.
- Deploy MAX on GPU with self-hosted endpoints: Learn how to deploy MAX pipelines to cloud.
Was this page helpful?
Thank you! We'll create more content like this.
Thank you for helping us improve!